
When to Plant Potatoes
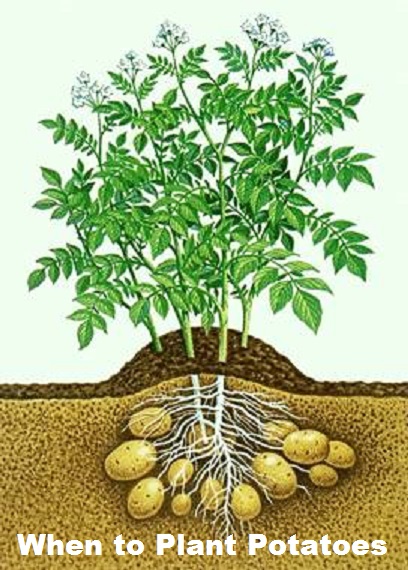
Graphic from Danny Look
Potatoes are easy to grow, but like cool weather, so you should try to get them into the ground at the right time. You can order seed potatoes through mail-order garden companies or buy them at local garden centers/ hardware stores. You should be aware that supermarket potatoes are usually treated with chemicals to keep them from sprouting, so they may not grow well. The Organic ones at the stores might grow. You can store your seed potatoes in the refrigerator until ready to plant.
STEP 1 — WHAT IS THE RECOMMENDED PLANTING DATE FOR YOUR AREA? You can check with your extension office to make sure. Since it takes potatoes two to three weeks to emerge from the ground, the earliest you should plant seed potatoes is two weeks before your last anticipated freeze date of 28 degrees Fahrenheit or lower. About a week before your planting-out date, bring the seed out of the fridge and place it in a bright warm window for about a week. This will help break the spuds’ dormancy and assure they will grow quickly when you put them into the still-cool spring soil.
If you garden in an area that has hot summers, be sure to plant your potatoes early. To play it safe, choose potato varieties that mature in early- or mid-season. Potatoes don’t do well when the temperatures climb into the 90s. They may actually keel over and die when the temperature gets to 95
degrees.
Mounding and Hilling are the best ways of growing spuds. But if you’re only going to be growing a few, or if you have plans to get new potatoes from the vines early in their growing season, this simple method below is worth a try.
STEP 2 — PREPARING THE SEED POTATOES. Cut your potatoes into several 1-inch to 2-inch chunks. Include at least 1 or 2 “eyes” on each piece. This is the growth point where the new plants emerge. Don’t cut the pieces too big. A smaller chunk of potato encourages the plant to get busy and put down its own, strong roots, rather than live off the stored foods in the seed piece. Let the pieces air-dry, for 24 hours. This toughens the outer layer of the potato and helps it resist disease. You can also give the potato pieces a light dusting of sulfur powder to help prevent fungi from attacking them. Shake the pieces in a bag with a small amount of the powder until the pieces are evenly coated. The spuds will be fine without chemical treatments if the soil they’re planted in is dry and warm.
STEP 3 — PREPARE YOUR SOIL. With this method, you don’t need to dig trenches or mound soil into hills. Just work a trowel full of compost into a square foot of soil in a sunny, well-drained area of the garden. The soil should be loose enough for the potato to send down roots easily. Take a piece of seed potato and press it firmly into contact with the soil. Be sure the “eye” faces up when you do this.
STEP 4 — MOUND UP THE MULCH. Build up a 6-inch-deep mound of mulch over the potato. Water the mound gently to thoroughly wet the mulch. This will help it hold together. Keep the mound evenly moist. As the vines start to peek through the mound, begin feeding them with a half-strength foliar spray. Use fish-emulsion or seaweed extract once a week until the flowers open, then stop feeding. Mound additional mulch around the stems each time they’ve grown about 6 more inches. Potatoes grow at the ends of stolon that the plant puts out wherever the stems are covered with mulch. So, in time your plant will have tubers in several sizes within the mound.
STEP 5 — TIME TO HARVEST. The best part about this method is that you can get NEW potatoes, the creamers and steamers, without disturbing the plant. If that’s your goal for your potatoes, the time to go after the first new spuds is right after the flowers bloom. Just move the mulch gently out of the way and pop the new potatoes off the ends of the stolon with your fingers. Only take about 20 percent of the new potatoes at a time. Let the rest remain to keep the plant from getting too stressed. Continue watering the plants throughout the season to keep them producing new potatoes. If you’d prefer to let the potatoes mature and get larger, stop watering them after the flowers bloom. This causes the plant to start concentrating on developing the potatoes. Then, in the fall, when the plant begins to die back, move the mulch away and harvest the full-grown potatoes.
You can get small farm grown non-GMO seeds at the link below and get busy planting!
Source: Danny Look
 This is an aggregated site. Please be aware some of the sites we link to could have pop ups. We have no control over them. However, we will never link you to a site that requires you to make any purchase to view the blog.
Please read our disclaimer. We provide you with information from various sites all over the world. The author’s expressed opinion isn’t necessarily that of The Prepared Page or its staff. Our intent is to bring you the information. Use your and your own best judgment when using any information contained within the blogs.
While you’re here check out some of the other posts you may find them interesting!!!
Some posts may contain affiliate links.
Related Posts
 40+ Edible Flowers and How to Use Them
 Fruit Salad Trees: What They Are & How to Grow Them
 Food Producing Bushes That Can Provide For The Winter Months
 What Foods can be and How to Store Them Underground
 Foods that Need to be Repackaged Prior to Long Term Storage
 Get Fruit Harvests In Small Spaces by Espaliering Trees
